Tag: arts & crafts

  • Easy DIY Halloween Pumpkin Carving Tutorial and Tips For Beginners

    Easy DIY Halloween Pumpkin Carving Tutorial and Tips For Beginners

    With Halloween just around the corner, I thought I’d do an easy Halloween pumpkin carving tutorial for beginners. If you haven’t carved out a pumpkin before, it’s not as daunting as you think! It’ll probably end up being quite fun!

    Check out the video below and follow along if this is your first time carving a pumpkin for Halloween!

    Article in association with https://www.courses.com.au/

    What you will need

    • A keyhole saw
    • Fine carving tool (a clay or lino tool from the craft shop)
    • Ice cream scoop
    • Metal skewer
    • Sticky tape
    • 1 x American pumpkin
    • 1 x face design (draw your own onto a piece of A4 paper)
    • a church or pillar candle

    Start by cutting out a section in the top of the pumpkin for the lid. Use the key hole saw, working around the top in a circle and make sure you include a ‘notch’ for the lid. This will make it easier to refit the lid every time you need to take it on and off.

    Once you’ve cut out the lid, trim back the inside flesh on both the lid section and the main section of the pumpkin using the keyhole saw. The thinner you can get the flesh interior, the better your Jack o’Lantern will glow. So try to scrape back as much of the flesh as possible without losing the structural integrity of the pumpkin.

    Use the ice cream scoop to scrape out the seeds and flesh. You’ll need to keep working at this until you get a nice thin shell – alternately using the ice cream scoop and the fine carving tool to whittle away the inside of the pumpkin flesh.

    Once you have the inside of the pumpkin nice and clean, you can start on the face.

    Tape your face design to the front of the pumpkin and use a skewer to mark out the design onto the pumpkin’s surface.

    Now use the keyhole saw and fine carving tool to carve out the facial features. At this point, depending on your design, you can also use a cordless drill to carve out smaller holes.

    When that’s done, you’ll need to make one more hole in the bottom of the lantern for the candle to sit inside. The lantern will be placed over the top of the candle, so make sure the hole is big enough to comfortably fit the candle.

    Now light up the candle, place the lantern over the top and put Jack out on the doorstep.

    Trick or treat!

    Enjoyed this Halloween pumpkin carving tutorial? Pin it for later or next year!

    DIY Halloween Pumpkin Carving Tutorial

  • 10 Halloween Mason Jar Gift Ideas That You Would Never Think Of

    10 Halloween Mason Jar Gift Ideas That You Would Never Think Of

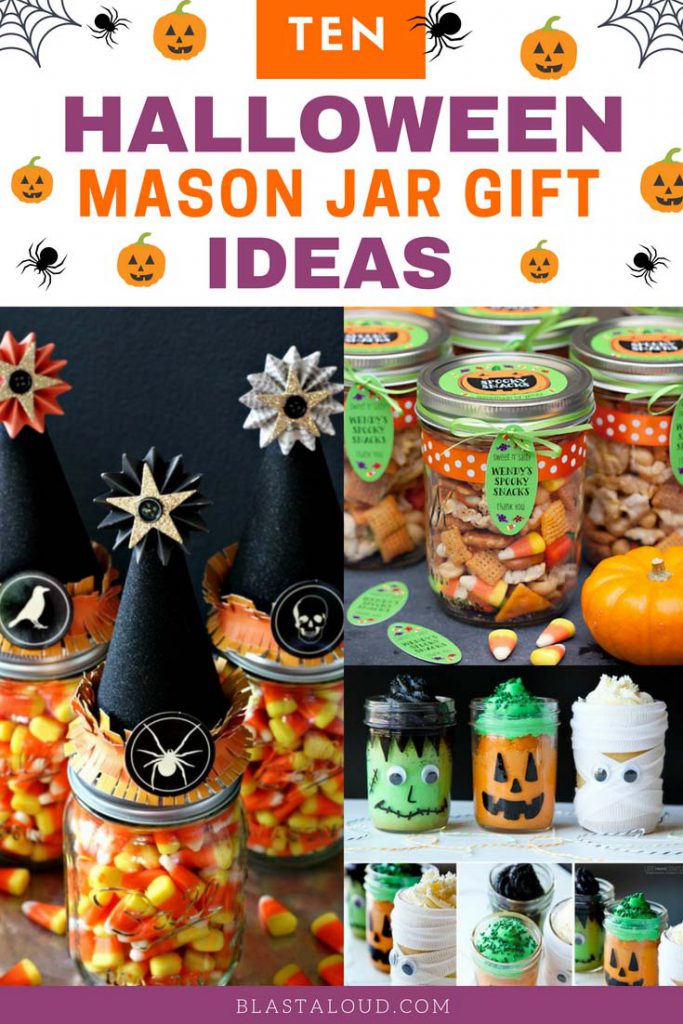
    It’s time to start saving up on those mason jars again, and this time for some awesome Halloween creations! Now I’m not sure if its normal to give gifts on Halloween, but I’m always looking for opportunities to give gifts. So, of course, today I’m sharing some of my favorite Halloween mason jar gift ideas I came across.

    Halloween Mason Jar Gift Ideas

    If you’re having a Halloween party or just want in on some Halloween fun, there’s always something you can do with mason jars.

    Mason jars are super versatile cause you can use them for almost any occasion. Not to mention they’re also really affordable and adorable (or spooky, in this case). You can decorate your mason jars in so many ways for Halloween and use it as decor, treat holders, and also for Halloween gifts!

    The Halloween mason jar gift ideas below are perfect to gift to friends, family,teachers and even co workers. They all have the personal touch of being handmade so people will surely appreciate them (I know I would!).

    Hope you enjoy!

    1. Halloween Cookies Mix in a Jar

    Cookie mix in a jar is one of my favorite types of gifts. It looks really cute and also works well for any occasion as you can simply decorate the mason jar to fit whatever occasion it is for.

    In this case, we have Halloween cookies with red, white and yellow M&Ms to create Candy Corn cookies.

    Halloween mason jar gift ideas: Halloween Cookies Mix in a JarFound from lilluna

    2. Pumpkin Mason Jar Holders

    These pumpkin mason jars could work perfectly well for either Halloween, Thanksgiving or fall in general.

    If you want to give them a more spooky Halloween feel, you could draw or paint faces on the “pumpkins”. Fill them with any Halloween sweets and candies you like!

    Halloween mason jar gift ideas: Pumpkin Mason Jar HoldersFound from the36thavenue

    3. Halloween Mason Jar Mini Cakes

    Instead of giving a cake mix in a mason jar, you could also opt to make the cake inside the mason jar yourself.

    Check out these cute Halloween cakes and how the decorations on the mason jar compliments the cake.

    Halloween mason jar gift ideas: Halloween Mason Jar Mini CakesFound from lifemadesimplebakes

    4. Bugs & Kisses

    Really simple and hassle free, this bugs & kisses Halloween mason jar gift is a really cool idea.

    You just need to add your kisses and some bugs/spiders to your mason jar. Top it off with a ribbon and the label and there you have it. You can find the free printable over at the website linked below.

    Halloween mason jar gift ideas: Bugs and KissesFound from homebyheidi

    5. Brains Cupcake in a Jar

    Another cup cake, this one with a more gory twist perfect for Halloween!

    This would be perfect as a brainy gift to someone or even as treats at a Halloween party.

    Halloween mason jar gift ideas: Brains Cupcake in a JarFound from livinglocurto

    6. Witches’ Vitamins

    How cute are these mason jars with witch hats?

    You can fill them candy corn or any Halloween appropriate mix for a witch’s brew or vitamins mix.

    Halloween mason jar gift ideas: Witch VitaminsFound from nestofposies

    7. Toxic Treats Mason Jar Gift

    Moving away from the more traditional orange Halloween colors, this toxic treats mason jar would be the perfect gift for friends or teachers.

    And it only takes a couple of minutes to make!

    Halloween mason jar gift ideas: Toxic Treats Mason Jar GiftFound from gingersnapcrafts

    8. Halloween Snack Mix

    Perfect as Halloween party favors or thank you gifts, these snack mix mason jars are colorful and fun.

    If you already have the snack mix, then it’s easy to make a couple of these quickly. Just fill the mason jars up and add the ribbons and printable labels.

    Halloween mason jar gift ideas: Halloween Snack MixFound from evermine

    9. Pumpkin Spice Pretzels in a Jar

    This one is a bit on the simpler toned down side, but could still be a great gift or treat for Halloween. I had to include it cause I happen to like pretzels.

    You could also use some of the other ideas in this post to dress this mason jar up a bit if you like.

    Halloween mason jar gift ideas: Halloween Pretzels in a JarFound from zenandspice

    10. Candy Corn Trifle

    Another dessert in a jar, this time a trifle in Halloween candy corn colors. Candy corns are a classic Halloween treat so I really love the idea of this candy corn trifle.

    These would be perfect as dessert at a Halloween party. Or, if you’re looking to give this as a gift, I would just add make the trifle portion a tad bit smaller so that the lid of the mason jar can still fit on top.

    Halloween mason jar gift ideas: Candy Corn TrifleFound from thissillygirlskitchen

    Looking for other Halloween ideas? Check out these posts:

    Pin These Halloween Mason Jar Gift Ideas To Pinterest!

    I know its still while till Halloween, so if you want to get back to this post for inspiration closer to Halloween, save this post on Halloween mason jar gift ideas to your Halloween board on Pinterest!

    Halloween mason jar gift ideas

  • 10 Halloween Crafts For Kids They Will Love Making

    10 Halloween Crafts For Kids They Will Love Making

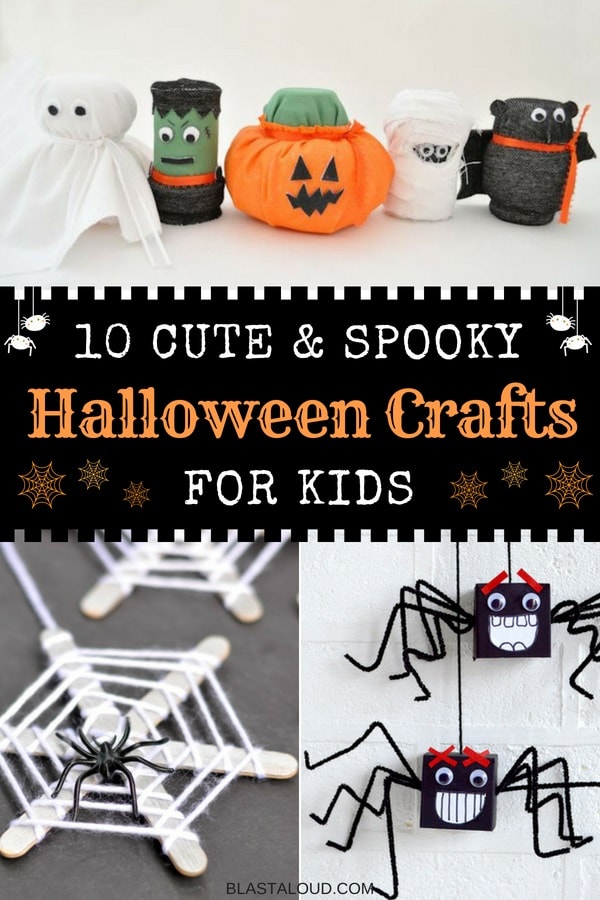
    Halloween is never boring, there are so many fun activities to do for kids and adults alike, including making Halloween crafts! If you’re looking to keep your little ones busy this Halloween season, have them make some of this fun and creative Halloween crafts for kids.

    Halloween Crafts For Kids That Are Fun Making

    My love for Halloween stems from all the fun we had during this festive time when we were kids. There was always lots of crafts and activities to do during Halloween – there was never a dull moment!

    Having your kids participate in decorating for Halloween and making Halloween crafts will leave them with many fond memories of Halloween. It will also keep them busy

    I’ve rounded up some of my favorite Halloween crafts for kids that they will actually enjoy making. And who knows, maybe you will enjoy making it with them!

    1. Stick spiderwebs

    These stick spiderwebs are easy and really inexpensive to make, and its also lots of fun wrap the white yarn around the sticks.

    The kids can experiment with different patterns and colors and you can use it for Halloween decor so it’s a win-win!

    Halloween crafts for kids: Stick spiderwebsFound from happyhourprojects.com

    2. Tin can ghost windsock

    Another craft that the kids will enjoy making and that you can proudly hang inside or outside for Halloween.

    There is a bit of wait time involved with this one as you have to wait for the paint to dry before you finish the final project. But while waiting you can start cutting the ribbon for the bottom so long.

    Halloween crafts for kids: Tin can ghost windsockFound from chickenscratchny.com

    3. Yarn wrapped mummy

    How cute is this mummy?

    Have your kids draw and cut out a basic gingerbread man-like shape from cardboard. This can either be black cardboard or any color which they can then paint black.

    Then just glue the eyes to the mummy and start wrapping the mummy with yarn. Glue or tape the end of the yarn to the back of the mummy for easier wrapping.

    Halloween crafts for kids: Yarn Wrapped MummyFound from iheartcraftythings.com

    4. Clothespin bats

    For these clothespin bats, paint the clothespins black using acrylic paint and let them dry.

    While waiting for them to dry, draw out the shape of a bat wing on cardboard and cut it out. Use it to trace, draw and cut out multiple bat wings from the cardboard.

    Fold over a small tab on the inner edge of each batwing (like shown in the picture) and glue them to the sides of the clothespin.

    Halloween crafts for kids: Clothespin BatsFound from parents.com

    5. Halloween monsters

    Amy shows how you can make various Halloween monsters from empty pill bottles. If you don’t have this, I think this would also work perfectly with toilet paper rolls.

    There are some monsters not included in the image below, so check out her blog if you want to see the other ones.

    Halloween crafts for kids: Halloween monstersFound from thisheartofmineblog.com

    6. Halloween spider slime

    Is Halloween really complete without Halloween slime? I think not!

    This slime is very easy to make with only a couple of ingredients. Let the kids help you by mixing the ingredients and kneading the sticky mixture until it is proper slime.

    This recipe makes a big bucket so there should be enough slime to play with for 3-4 kids.

    Halloween crafts for kids: Halloween Spider SlimeFound from thetiptoefairy.com

    7. Halloween ghost bombs

    If you don’t mind a bit of a mess outside, these ghost bombs are the bomb (ha)!

    They are a bit delicate to make as you have to work with the eggshells, but they’re definitely worth making and a ton of fun to throw around outside!

    Halloween crafts for kids: Ghost bombsFound from growingajeweledrose.com

    8. Pumpkin popsicle stick door hangers

    What a cute idea to decorate door knobs for Halloween! Have them make these cute door hangers and hang it on their doors during Halloween.

    You’ll need popsicle sticks (if you don’t have any you could buy them at any craft store), glue, paint and pipe cleaners (ribbons could work too).

    Halloween crafts for kids: Pumpkin popsicle stick door hangersFound from thesuburbanmom.com

    9. Cardboard box spiders

    These cardboard-box spiders are really cheap and easy to make with items you probably already have in your house!

    You can use any type of small cardboard box (e.g. a box that medicine or cream or some type of product came in) and paint it black for the body. Then just draw a mouth on paper, cut it out and glue it to the body together with eyes. Use pipe cleaners for the legs.

    Halloween crafts for kids: Cardboard box spidersFound from mollymoocrafts.com

    10. Toilet roll bats

    These toilet roll bats are really simple and quick to make (aside from waiting for paint to dry) and will only take you about 5 minutes to do.

    If you don’t have empty toilet rolls at your disposal, you could also use a paper towel roll or wrapping paper tube and cut it down to smaller sizes.

    Halloween crafts for kids: Toilet roll batsFound from practicallyfunctional.com

    Looking for other Halloween ideas? Check out these posts:

    Don’t forget to pin these Halloween crafts for kids to your Halloween board on Pinterest!

    Pin these Halloween crafts for kids to your Halloween board on Pinterest so you can easily get back to it later!

    Halloween crafts for kids

  • 15 Bullet Journal Weekly Spread And Layout Ideas To Organize Your Entire Week

    15 Bullet Journal Weekly Spread And Layout Ideas To Organize Your Entire Week


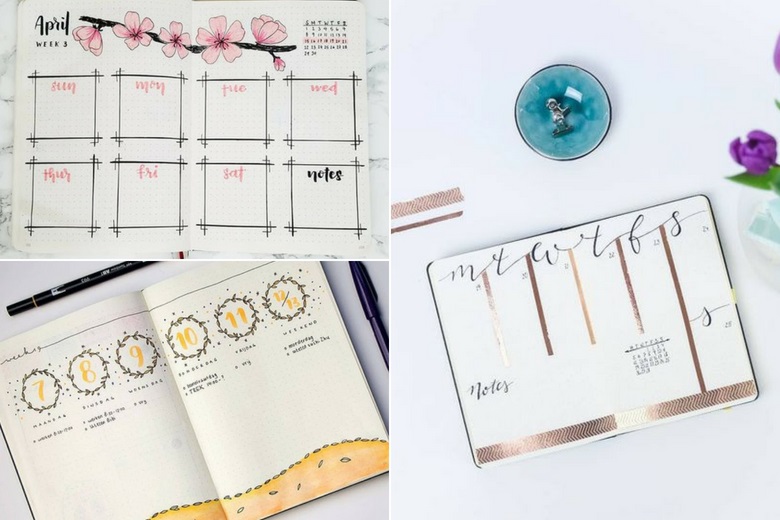
    I don’t know about you, but I love to experiment with different layouts and weekly spreads in my bujo. But I’m not that great yet at coming up with my own bullet journal weekly spread ideas (no shame in that!), so I always end up looking for inspiration on Pinterest.

    Note: This post contains affiliate links, which means I may earn a small commission – at no extra cost to you – if you purchase something through one of my links. Please see my full affiliate disclaimer here.

    15 Creative Bullet Journal Weekly Spread Layouts

    Some of you probably prefer to keep things the same to create a cohesive look in your bujo, but I like trying something different every now and then. So I’ve rounded up some great bullet journal weekly spread ideas to try.

    So whether you’re just starting out with your bujo or you’re already a bujo junky, these bullet journal weekly spreads are sure to give you some inspiration for your bujo!


    Thought I’d start out with this minimalist weekly spread that is also easy to do. Your weekly spread doesn’t always have to be difficult and elaborate, sometimes all you need is a simple design.

    1

    This is another cute but simple design that is easy to do and that looks a bit more creative. You also get some extra space for reminders and to-do lists, which is always useful!

    2

    This weekly spread is simple and elegant with the cherry blossom on top.

    A small monthly calendar in the top right corner also makes it really easy to see at a glance which week in the month the current spread falls into. I think it’s a really nice idea!

    3

    Love this minimalist spread with the days lined up in circles.

    Depending on how small you go, you can easily get your weekly layout done on a single page.

    4

    If you want to try something different that’s bold and striking, what about this honeycomb design?

    To achieve this look, I’d suggest that you first plan out your hexagons so that they are all the same size and all fit across the page.

    You could of course also just start out one side and make varying sizes to fit them all in, it would also look cute!

    5

    How cute is this colorful cactus spread?!

    I’ll admit that I haven’t actually used washi tape in my bullet journals before, but I think it’s a really great idea.

    If you’re not very artistic (I can’t draw you guys!), using washi tape can add that pop of color and creative touch to your bujo!

    6

    This palm tree weekly bujo spread is simple, clean and effective.

    And it’s perfect for summer!

    7

    If you’re a comic book lover, you’ll probably love this bullet journal weekly spread that reminds you of a comic book.

    The comic book layout has just the right balance of comic book elements while still having enough space for you to jot down your daily tasks.

    8

    Another simple but elegant design achieved by using golden washi tape as dividers.

    9

    With some blue watercolor, cursive script and some dots, you can create these lovely headers for your bullet journal.

    Reminds me of the ocean and summer!

    10

    If you love wreaths, you will probably love this weekly spread with wreath-like borders for the days.

    The spread also looks fun but still looks clean and organized, which I love!

    11

    This one is for plant lovers or cactus lovers. I think it looks super cute to decorate your borders with these plant doodles.

    You could, of course, do this sort of layout with any type of doodle, bees, rainbows, whatever you like!

    12

    Love this black and white minimalist weekly bullet journal spread.

    It’s simple and clean and easy enough for anyone to recreate.

    13

    Another plant inspired weekly bullet journal layout.

    The design is simple enough for anyone to copy, just add your day blocks and then you can add your own custom doodles!

    14

    Thought this weekly bullet journal spread would be cute for a snowy week, or even for days leading up to Christmas. It just gives off a festive kind of vibe.

    15

    If you enjoyed this roundup of bullet journal weekly spread and layout ideas, also check out these 30+ bullet journal ideas you have to try in your bujo!

    Enjoyed these bullet journal weekly spread and layout ideas? Pin it for later!

    Bullet Journal Weekly Layouts

    Bullet Journal Weekly Layouts 2

  • DIY Fall Wreath Ideas: 15 Fall Wreaths That Will Brighten Up Your Front Door

    DIY Fall Wreath Ideas: 15 Fall Wreaths That Will Brighten Up Your Front Door

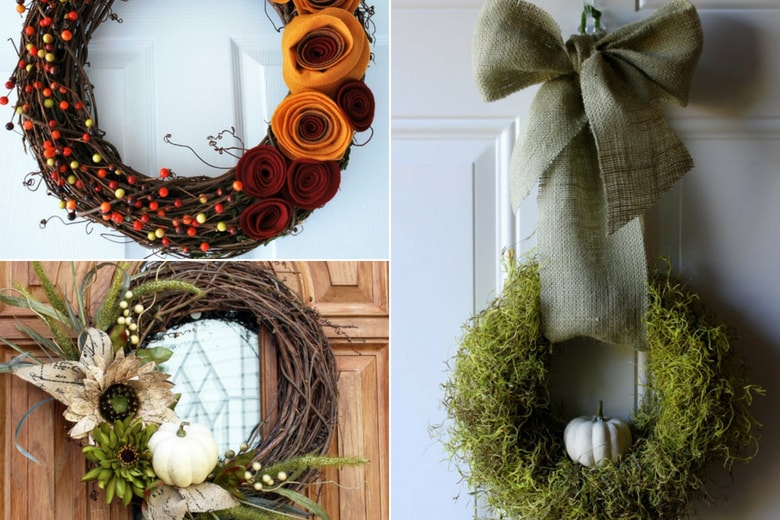
    Fall is probably my favorite season. I just love all the warm earthy colors that come into play this time of year. And I also love bringing those colors and fall feeling into my home. So I’ve been looking at some easy to do DIY fall wreath ideas so I can brighten up my front door and welcome the colors of fall.

    Note: This post contains affiliate links, which means I may receive a small commission if you purchase an item through my links. Please see my full affiliate disclaimer here.

    15 DIY Fall Wreath Ideas To Try

    For some of these DIY wreaths you can use either a wreath frame or a grapevine wreath that you can find on Amazon or at your local craft store.

    To see the full tutorial for each of these fall wreaths, please click on the link below each image. They contain some useful tips on making your wreath!

    1. Neutral Fall Wreath

    Thought I’d start out with a simple, neutral colored fall wreath.

    This one is really easy to make. All you need to do is cut a drop cloth into lots of strips and tie them to your wreath frame until you can’t see the wire anymore.

    DIY Fall Wreath: Neutral Fall WreathFound from livelaughrowe.com

    2. Indian Corn Wreath

    This one uses a straw wreath as the base, and is actually super easy to make and can be done in about 30 minutes.

    You’ll need some multi-colored corn (the author picked up hers from her local Amish greenhouse) and some hot glue. Just fluff the husks on the mini corn, and glue them to the straw wreath.

    DIY Fall Wreath: Indian Corn WreathFound from stonegableblog.com

    3. Burlap Bunting Wreath

    If you’re looking for a simple, minimalist wreath that still make a bold statement, this is the wreath for you.

    Make your own burlap bunting with the letters of your choice and simply tie it to the grapevine wreath.

    Burlap Bunting DIY Fall WreathFound from makeit-loveit.com

    4. Sunshine Wreath

    This sunshine wreath actually uses some cut out cardboard for the wreath base.

    It takes a bit more work to gather all the sticks and make the rosettes, but in the end it will be so worth it when you have this unique wreath!

    DIY Fall Wreath: Sunshine WreathFound from yellowmums.blogspot.com

    5. Felt Leaf Wreath

    To make this wreath, you’ll need to get a wispy wreath with swirly branches as your base. You can get this at garden nurseries and home stores.

    Then you just need to cut out and add some felt leaves to create this stunning piece.

    DIY Fall Wreath: Felt Leaf WreathFound from liagriffith.com

    6. White Pumpkin Wreath

    This white pumpkin wreath uses a leaf wreath as the base, but you could also recreate this look by simply wrapping a leaf garland around a grapevine wreath.

    Then you just need to add the mini pumpkins and the Japanese lantern spray to complete the look.

    DIY Fall Wreath: White Pumpkin WreathFound from stonegableblog.com

    7. Decorated Fall Wreath

    If you don’t want to go for the oranges and yellows with your fall wreath, you can also go for shades of green, white and brown.

    This beautiful wreath does just that while still giving off that cozy fall feeling.

    DIY Fall Wreath: Nature Fall WreathFound from confessionsofaserialdiyer.com

    8. Rustic Fall Wreath

    This lovely rustic fall wreath again uses a stick/branch wreath as the base.

    Then the author added some small paper pumpkins and faux fall leaves (you could use real ones too!).

    DIY Fall Wreath: Rustic Fall WreathFound from houseofjoyfulnoise.com

    9. Moss Wreath

    This moss wreath keeps a neutral color scheme and looks so simple and elegant.

    DIY Fall Wreath: Moss WreathFound from thecharmofhome.blogspot.com

    10. Raffia Wreath

    Believe it or not, this wreath is actually really easy to make, and also cost under $15!

    I just love the messy and fluffy look of this wreath, and it fills up the door

    DIY Fall Wreath: Raffia WreathFound from stonegableblog.com

    11. Circle Pumpkin Wreath

    How cute is this wreath with mini pumpkins!?

    This wreath actually uses real pumpkins, check out the tutorial to see how to make your pumpkins and gourds last longer and not mold.

    DIY Fall Wreath: Circle Pumpkin WreathFound from onsuttonplace.com

    12. Felt Rosettes Wreath

    This wreath is really simple and easy to make, the author of the tutorial purchased everything for less than $10.

    The tutorial also shows an easy way to create those felt rosettes.

    DIY Fall Wreath: Felt Rosettes WreathFound from craftingmom.com

    13. Rustic Burlap & Yarn Wreath

    Another neutral color palette wreath, this one uses a foam wreath form as a base, but you could just as easily cut out your wreath base from cardboard or something similar.

    DIY Fall Wreath: Rustic Burlap and Yarn WreathFound from blog.consumercrafts.com

    14. DIY Fall Wreath With Bling

    If you want to add a bit of bling to your wreath, why not try this one out?

    Just spray paint some leaves and berries with colors of gold and silver and add it to your wreath base.

    DIY Fall Wreath With BlingFound from frugalflourish.blogspot.com

    15. Fall Leaf Wreath

    This is also a super easy wreath to make that is bright and full of color.

    You can use real leaves or preserved leaves that you can get from a craft store, and simply  stick the branches into your wreath base – no glue required.

    DIY Fall Wreath: Fall Leaf WreathFound from designimprovised.com

    Pin these DIY fall wreath ideas for later!

    If you enjoyed this roundup of DIY fall wreath ideas, please pin it to your fall or wreath board on Pinterest!

    Easy DIY Fall Wreath

    Easy DIY Fall Wreath

  • 10 Easy DIY 4th Of July Decorations And Crafts You Need To Try This Year

    10 Easy DIY 4th Of July Decorations And Crafts You Need To Try This Year

    With Independence Day coming up, many people are already starting to think about 4th of July decorations and crafts to make.

    Whether you’re hosting a party or barbecue, or just want to add a festive touch to your home, these easy DIY 4th of July decorations are perfect to celebrate Independence Day.

    Patriotic 4th Of July Decorations And Crafts

    There are many crafts you can make to decorate your home for the 4th of July that won’t require you to spend a lot of money.

    From paper garlands to candles to patriotic wreaths, I hope this list will inspire you and give you some ideas of how you can decorate your home to celebrate America.

    To see the full tutorial for any of these crafts (if available), please click on the link below each image.

    This post contains affiliate links, which means I earn a small commission – at no extra cost to you – if you purchase something through one of my links. Please see my full affiliate disclaimer here

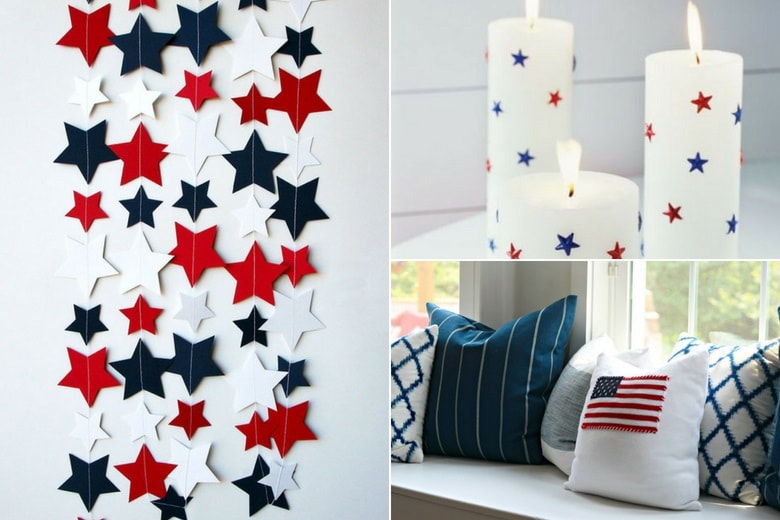
    1. Paper Star Garland

    This paper star garland is available from Etsy but is easy and simple enough to make yourself.

    You just need some paper stars and some string, then you can sew the string through the stars. You could also glue two stars together around the string to get the same result.

    4th Of July Decorations: Paper Star GarlandFound from Etsy

    2. Patriotic Clothespin Wreath

    If you’re looking to make a wreath for your door for Independence Day, this one is really easy to do and only requires a few supplies.

    4th Of July Decorations: Patriotic Clothespin WreathFound from Home Crafts By Ali

    3. Patriotic Paper Chain

    Another inexpensive paper craft you can make that will add a patriotic touch to your home. It looks adorable hanging from a mantle, dessert table or even as a party backdrop.

    It’s also the perfect craft to make with children as a fun activity that everyone can enjoy.

    4th Of July Decorations: Patriotic Paper ChainFound from Love The Day

    4. Painted Lawn Stars

    Okay, this is not really decor per say, but I think this is such a creative idea if you’re hosting a 4th of July party or barbecue and have a big lawn. It will really add to the fun and excitement of an Independence Day celebration.

    The paint the author used is construction marking paint intended for grass which you can find at any home improvement store. The paint will NOT kill the grass but it is permanent. This means you will only get it off by letting the grass grow out and then mowing it off (worth it in my opinion).

    4th Of July Decorations: Painted Lawn StarsFound from The Concrete Cottage

    5. Star Candles

    If you’ve got some plain white candles you can turn them into these star candles for minimalist Independence Day decorations.

    Just get some blue and red star stickers and white candles and you’re good to go!

    4th Of July Decorations: Star CandlesFound from Good Housekeeping

    6. American Flag Pillow

    To create this flag pillow, the author used an old sweater with an embroidered American flag and turned it into this cute pillow cover.

    You can also recreate this look with a blank white pillow by sewing or by gluing a small American flag onto the pillow.

    4th Of July Decorations: American Flag PillowFound from Thrifty Decor Chick

    7. American Flag Mason Jars

    Adding some 4th of July spirit to your home can be as easy as jazzing up a couple of mason jars!

    You can paint your mason jars or just add the American flag to them and then use them however you like. I would put flowers in them!

    4th Of July Decorations: American Flag Mason JarsFound from Our Unexpected Journey

    8. Pallet Flag

    With some paint and a wooden pallet, you can easily recreate this wooden pallet flag for your front porch.

    Of course, you don’t necessarily have to use a large pallet to do this. You can also do something similar with a smaller pallet and hang it on your door or wall for some 4th of July decorations.

    4th Of July Decorations: Pallet FlagFound from Saving By Design

    9. Easy Patriotic Centerpiece

    You can make this celebratory 4th of July centerpiece in a couple of minutes once you have all the items. You just need a mason jar, some rice, a couple of star picks and small flags to create this centerpiece.

    4th Of July Decorations: Easy Patriotic CenterpieceFound from Tidy Mom

    10. Patriotic Shutter

    You can decorate your home, yard or front porch with this easy to make patriotic shutter.

    You’ll need an old shutter, some tape and spray paint of the correct color. If you want to soften up the edges you can also drape some burlap and ropes over it like the author did in this case.

    4th Of July Decorations: Patriotic ShutterFound form Hoosier Homemade


    Want to make some of this 4th of July decorations later? Pin it to your Independence Day decorations board on Pinterest!

    4th Of July Decorations

    4th Of July Decorations

  • 15 Cute And Expensive Looking DIY Gifts You Have To Make

    15 Cute And Expensive Looking DIY Gifts You Have To Make

    Since Mother’s day is coming up, I’ve been thinking about what gift I could give to my mom (even though she says she doesn’t need anything).

    I always feel like I’m really bad with gifts since I struggle to pick something. But after thinking about it, I’ve decided to make something this year instead. So naturally, I ended up searching online for easy DIY gifts I could make.

    DIY Gifts That Everyone Will Love

    Now, these gifts aren’t specifically for Mother’s day though, you could make them for someone’s birthday, as a housewarming gift, or any other occasion. You get the idea.

    What I really love about DIY gifts is that they are so much more personal and special because you make them yourself. And the ones I found for you below are all really cute and useful too.

    For the full instructions on how to make any of the DIY gifts listed below, please click on the link underneath each image.

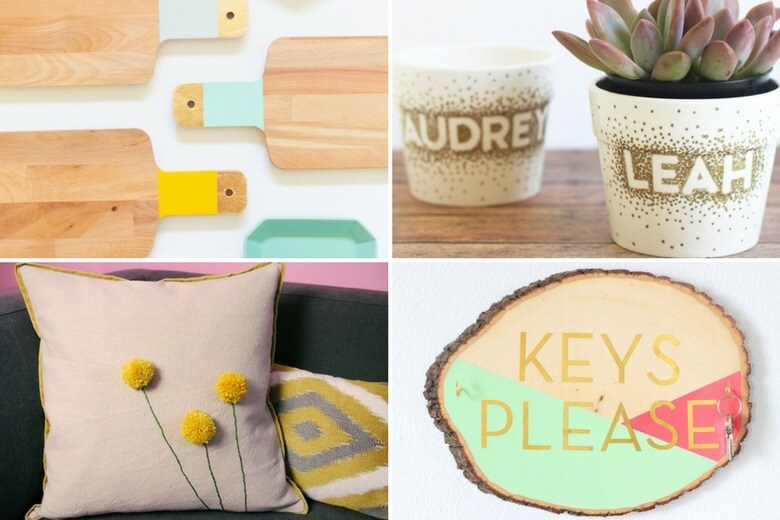
    1. Sharpie Dot DIY Flower Pots

    Such a cool idea to write someone’s name on a flower pot in such a cute way. It makes it so much more personal!

    You can also get creative and experiment with different colors or patterns.

    DIY Gifts: Sharpie Dot DIY Flower PotsFound from Cutesy Crafts

    2. Rose Petal Bath Salts

    These rose petal bath salts look so pretty in their glass jars.

    I think this could be a really cool gift for a bridal shower or spa day with friends.

    DIY Gifts: Rose Petal Bath SaltsFound from Paper n Stitch Blog

    3. DIY Sweater Mittens

    If you have any old sweaters lying around that you aren’t using anymore, why not repurpose them and make these cute mittens?

    DIY Gifts: DIY Sweater Mittens 1Found from Feathering My Nest

    4. Colorblock Cutting Boards

    Instead of giving someone a plain wooden chopping board, why not add a pop of color to it? It’s a simple touch that makes it look very elegant.

    Would make a great housewarming gift I think.

    DIY Gifts: Colorblock Cutting BoardsFound from Lovely Indeed

    5. Arm Knit Chunky Blanket

    Okay, I know this one might look like it would be too difficult to make, but it really isn’t.

    And you don’t need any special knitting skills or tools to make this blanket, so why not give it a try?

    The tutorial provides easy and clear step by step instructions that you can follow to make your own chunky knit blanket.

    DIY Gifts: Arm Knit Chunky BlanketFound from Made Up Style

    6. DIY Scented Room Spray

    Everyone loves walking into a room that smells fresh and clean, so these scented room sprays will be a big hit with any homemaker.

    You can create these using your favorite essential oils and scents.

    The extra detail of putting dried flowers in the bottles also makes it more special.

    DIY Gifts: DIY Scented Room SprayFound from Design Lovefest

    7. Vanilla Brown Sugar Scrub

    This sugar scrub is really easy to make, you just add all the ingredients together.

    Make it look cute and gift-worthy by putting it in a pretty jar or container.

    Finish it off by adding a printed tag and some string.

    DIY Gifts: Vanilla Brown Sugar ScrubFound from Suburban Simplicity

    8. Spray Paint Marble Planters

    These spray paint marble planters will all come out with their own unique design.

    It could take a few tries to get it right though, so the author suggests that you try it with some paper cups first.

    DIY Gifts: Spray Paint Marble PlantersFound from Vintage Revivals

    9. DIY Rope Basket

    This basket was actually a cheap dollar store basket, can you believe it?

    Adding the rope, some fabric and a bit of color make it look so much more expensive!

    DIY Gifts: DIY Rope BasketFound from Lydi Out Loud

    10. Gilded Edge Agate Coasters

    Instead of buying these coasters at an expensive price, you can make your own gilded edge agate coasters at about $8 each.

    All you need is some round, flat agates and gilded paint.

    DIY Gifts: Gilded Edge Agate CoastersFound from Making Lemonade Blog

    11. Microwavable Hand Warmers

    These hand warmers are pocket size, so you can keep them in your pockets to warm your hands. You could easily make larger ones too.

    These would make great gifts for children or anyone who gets cold easily!

    DIY Gifts: Microwavable Hand WarmersFound from Rae Ann Kelly

    12. Wooden Slab Keyholder

    If you know someone who’s always looking for their keys, this could be a useful gift.

    DIY Gifts: Wooden Slab KeyholderFound from The Crafted Life

    13. Galaxy Marble Coasters

    These galaxy marble coasters have such a cool design each one you make will be unique.

    You don’t have to stick to these colors though, you can experiment and make your own colored coasters.

    DIY Gifts: Galaxy Marble CoastersFound from A Kailo Chic Life

    14. Flower Throw Pillow

    Turn a plain inexpensive throw pillow into one that makes a statement!

    This could be perfect as a housewarming gift. Remember to consider the color of the person’s living room, you could make this in any color.

    DIY Gifts: Flower Throw PillowFound from West Elm

    15. Easy DIY Pom-Pom Rug

    This is one of my favorites. I love this fluffy and cozy pom-pom rug!

    And I really like that you can choose your own wool and colors to make someone totally unique!

    I’ll likely be making one of these for myself!

    DIY Gifts: Easy DIY Pom Pom RugFound from Home Lover


    If you found some inspiration from these DIY gifts and enjoyed this post, be sure to pin it to Pinterest so you can come back to it again later!

    Pin it for later!

    Easy DIY Gifts perfect for any occasion